HD Matrix
Commend
- Get award in the great hall of the people
- 2015 BCA In Marina Bay Sands in singapore
- xi 'an city visiting customer
- Hunan TV Station Visting …….
- HK electronic exhibition
- 4K*2K HDMI DVI Full HD Optical Transceiver
- CCBN 2015 successful exhibition--many customer
- SDI Splitter
- YPbPr to fiber/Fiber to YPbPr
- YPbPr to HDSDI converter and optical
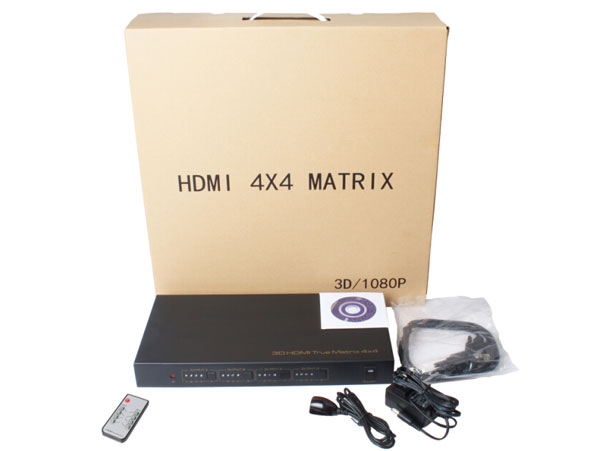
HDMI 4*4 matrix
< Click-Counts:12062 >
Feature:
lFour Input HD Source signals switch and distribute to four HD Displays
lSupport 30/36 Bit Deep Color
lSupport Blue-Ray DVD24/50/60fs/HD-DVD/xvYCC
lSupport Audio Format:DTS-HD/Dolby-trueHD/LPCM7.1/DTS/Dolby-AC3/DSD
lSupport Signal Retiming
lInput HDMI Cable length up to 10M if use the standard AWG26 HDMI Cable; Output HDMI Cable length up to 15M if use the standard AWG26 HDMI Cable.
lIt can use the remote to choose the signal source or switch the input signal source by press the switch button.
lUse 5V3A Power Adaptor
Package Content:
1. Main Unit
2. Power Adaptor
3. Remote
4. User Manual
5. CD (RS232 Control Software)
6. IR Extender Cable
7. RS232 Serial Port Cable
Port Showing Picture:


Picture 1.0 Front Panel Picture
1- 4:HDMI Input Status Led Light
IR :infrared sensor
Switch A :HDMI A Port Switch Button
Switch B :HDMI B Port Switch Button
Switch C :HDMI C Port Switch Button
Switch D :HDMI D Port Switch Button

Picture 1.1 Rear Panel Picture
DC 5V: Power Port
IR Extend:IR Extend Port
Output A-Output D:HDMI Output Port
Input 1- Input 4 :HDMI Input Port

Picture 1.1 Rear Panel Picture
RS232:RS232 Serial Port
OPERATIONG AND CONNECTION:
1. To use the HDMI cable to connect the four HD sources with the HDMI input port of the matrix.
2. To use the HDMI Cable to connect the four HD displays with the HDMI output port of the matrix.
3. To connect the power adaptor with the matrix.
4. To use the RS232 cable and the IR cable to connect the RS232 port and IR port of the matrix with the control equipment to do control to the matrix.
SPECIFICATION:
HDMI Input/Output Resolution……24/50/60fs/3D/1080p/1080i/720p/576p/576i/480p/480i
Deep Color…………………………………..…………….24bit/deep color 30bit,36bit
HDMI Audio Format……………….…DTS-HD/Dolby-trueHD/LPCM7.1/DTS/Dolby-AC3/DSD
HDMI Max bandwidth……………………………………………………………………225MHz
HDMI Max baud rate…….…………………….……………………………………..…6.75Gbps
Input/Output TMDS signal …………….…………………………..………0.5~1.5Volts p-p(TTL)
Input/Output DDC signal…………….…………………………………..………… 5Volts p-p (TTL)
HDMI Input cable distance.…... ……………….…………≤10m AWG26 HDMI standard cable
Output cable distance…………………………….………...≤15m AWG26 HDMI standard cable
Max working current……………………………….………………………………………….........2A
Power adapter format…………………..…………………………….…………………………5V/3A
Operating Temperature range……..…………….…….……………………………….…(-15 to +55℃)
Operating Humidity range…………………………………….….…5 to 90%RH (No Condensation)
Product size (L x W x H)……………………………….……………………………308X151X36 (mm)
Weight…..………………………………………………………..……………………………1216g
Matrix RS232 Control Software Instruction
COM Select : Choose the matched COM port; click the Connect Button, then Connect button will go bright. Control software begin being under control.
Massage Receive :Show the print info that the device feedbacked.
Status: Refresh current status info.
Clear : Delete the print info at the window.
EDID Setting : For preset the best EDID or copy the chosen output port EDID and save it at the device.
Button A-D :Represent the four output
Button 1-4 : Represent the chosen Input source, the bright number represent the current chosen input source.
Control Way: For example, if you want to choose the Input 2 to output by the Output C port, you can click the Number 2 below Letter C, then it will be ok.
Serial Port Protocol
Serial Port Protocol Format: Lenght+Start Code(0x55)+Instruciton Code+Parameter(It can be without)+Finish Code(0x77)
|
Command (hex)
|
feedback
|
description
|
|
0x04 0x55 0x20 0x77
|
\r\n s1x s2x s3x s4x EEx
|
To get the output port working status and the EDID status.
|
|
0x05 0x55 0x19 0x09 0x77
|
s10
|
Output 1 chosen the input 1
|
|
0x05 0x55 0x19 0x1D 0x77
|
s11
|
Output 1 chosen the input 2
|
|
0x05 0x55 0x19 0x1F 0x77
|
s12
|
Output 1 chosen the input 3
|
|
0x05 0x55 0x19 0x0D 0x77
|
s13
|
Output 1 chosen the input 4
|
|
0x05 0x55 0x19 0x17 0x77
|
s20
|
Output 2 chosen the input 1
|
|
0x05 0x55 0x19 0x12 0x77
|
s21
|
Output 2 chosen the input 2
|
|
0x05 0x55 0x19 0x59 0x77
|
s22
|
Output 2 chosen the input 3
|
|
0x05 0x55 0x19 0x08 0x77
|
s23
|
Output 2 chosen the input 4
|
|
0x05 0x55 0x19 0x5E 0x77
|
s30
|
Output 3 chosen the input 1
|
|
0x05 0x55 0x19 0x06 0x77
|
s31
|
Output 3 chosen the input 2
|
|
0x05 0x55 0x19 0x05 0x77
|
s32
|
Output 3 chosen the input 3
|
|
0x05 0x55 0x19 0x03 0x77
|
s33
|
Output 3 chosen the input 4
|
|
0x05 0x55 0x19 0x18 0x77
|
s40
|
Output 4 chosen the input 1
|
|
0x05 0x55 0x19 0x44 0x77
|
s41
|
Output 4 chosen the input 2
|
|
0x05 0x55 0x19 0x0F 0x77
|
s42
|
Output 4 chosen the input 3
|
|
0x05 0x55 0x19 0x51 0x77
|
s43
|
Output 4 chosen the input 4
|
|
0x05 0x55 0x18 0x00 0x77
|
EE0
|
EDID mix
|
|
0x05 0x55 0x18 0x01 0x77
|
EE1
|
EDID copy form output 1
|
|
0x05 0x55 0x18 0x02 0x77
|
EE2
|
EDID copy form output 2
|
|
0x05 0x55 0x18 0x03 0x77
|
EE3
|
EDID copy form output 3
|
|
0x05 0x55 0x18 0x04 0x77
|
EE4
|
EDID copy form output 4
|
|
0x05 0x55 0x18 0x05 0x77
|
EE5
|
EDID 2D 2CH
|
|
0x05 0x55 0x18 0x06 0x77
|
EE6
|
EDID 2D 5.1CH
|
|
0x05 0x55 0x18 0x07 0x77
|
EE7
|
EDID 2D 7.1CH
|
|
0x05 0x55 0x18 0x08 0x77
|
EE8
|
EDID 3D 2CH
|
|
0x05 0x55 0x18 0x09 0x77
|
EE9
|
EDID 3D 5.1CH
|
|
0x05 0x55 0x18 0x0a 0x77
|
EEa
|
EDID 3D 7.1CH
|
Notes:
Pls use the machine as the instruction listed to keep the long use lifetime of the machine.
1、 The machine should be placed at the spot far from the Damp, High-Temperature, Dusty, Erosive, and oxidative environment.
2、 All parts will be free from the strong shake, hit, fall.
3、 Touching the power adapter with the wet hands is prohibited.
4、 Pls hold the power adapter head and do not pull the power cord when cut off from the socket.
5、 Pls turn the power off when the machines not used for long time.
6、 Pls do not open the cover and do not touch the inside parts.
7、 Pls use the original factory power adapter.
FAQ:
Before power on, pls check the connection line carefully. And make sure that all interfaces are normally connected. The common trouble shooting way shows below:
|
Serial NO
|
Problem Description
|
Solutions
|
|
1
|
Non-Power-Connected
|
1. Check if the power adaptor head is truly and correctly inserted the power socket.
2. Check input signal source if it is in standby status.
|
|
2
|
No Picture
|
1. Pls to make sure that the TV is on and has been connected with the machine.
2. To check if the signal source is on and well connected.
3. Check if the line is all good quality.
4. Check signal source channel selection is correct
|
|
3
|
Obscure Picture
|
1. To try again to connect the cable to be free from the unsuccessful connection.
2. HDMI Cable Quality
|
|
4
|
Remote
|
1. Pls check if the insulation film at the rear of remote have been pulled out.
2. Pls check if the cell button power have been used out?
|
